
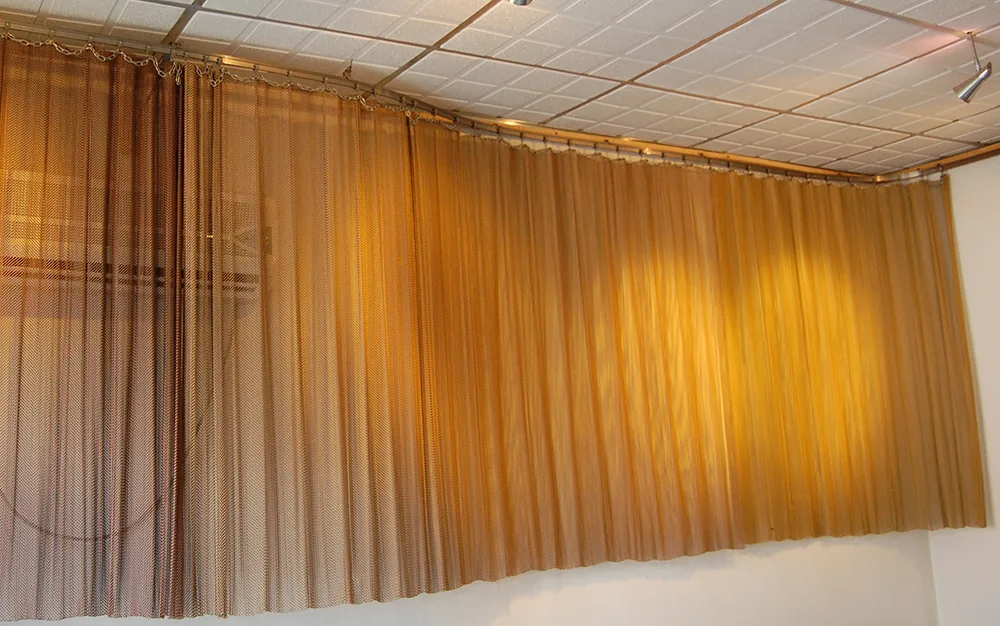
Metal coil curtains are increasingly specified for commercial interiors because they solve a problem that fabric curtains cannot: they combine visual softness with fire resistance, durability, and near-zero maintenance. For architects, contractors, and facility managers sourcing for hotels, offices, retail spaces, or exhibition halls, the installation process is more straightforward than it looks—provided the track system is planned correctly and the weight is respected.
This guide walks through the standard track-based installation of metal coil drapery, from pre-installation checks to final adjustments, with the practical details that matter on site.
Jump to: Key takeaways · Before you start · 1. Pulleys · 2. Track · 3. Fixing chain · Safety · Maintenance · FAQ
Metal coil curtain installation in five lines
- Check the load before you drill. Coil curtains weigh 4.2–6 kg/m², so a 3 m × 2.5 m panel in 1.2 mm stainless can approach 45 kg.
- A pulley about every 15 cm, fixing chain points at about 10 cm. That spacing is what sets the pleats and spreads the load.
- Order 150%–200% fullness: the curtain must be at least 1.2 times the length of the track, or the folds flatten out.
- Anchor to structure, not to the finished ceiling. A quality pulley carries about 80 kg, but the track still needs real fixings behind it.
- The fixing chain decides how the curtain behaves: connected to the end cap the pleats are locked; left disconnected the curtain draws open and closed.
Before You Start: What You Need on Site
A complete metal coil drapery installation relies on a track system and its accessories: track, pulleys, mounting screws, fixing chains, track end caps, and suspension brackets. Confirm that all components have arrived and are compatible before drilling begins.
Track, pulley and curtain are specified as one set — the metal coil drapery range lists the track profiles, pulleys and standard panel sizes they are made for.
Tools required:
- Tape measure and level
- Power drill with bits suitable for the mounting surface (concrete, drywall, or wood)
- Stud finder (for drywall or wood-frame ceilings)
- Screwdrivers (#1 and #2 Phillips)
- Pliers
Site checks:
- Measure the opening and the drapery. Metal coil curtain weight typically ranges from 4.2 kg/m² to 6 kg/m² depending on material and wire diameter. A 3 m × 2.5 m panel in 1.2 mm stainless steel can approach 45 kg. Verify that the ceiling structure or wall can carry the load plus the track hardware.
- Check the mounting surface. For ceiling-mounted installations, locate joists or structural supports. For concrete, use appropriate masonry anchors. Avoid mounting heavy tracks into unsupported drywall alone.
- Confirm the track type. Straight aluminum alloy tracks are standard for most rectangular openings. Curved tracks are available for radius walls or design features. Each pulley in a quality aluminum track can typically bear 80 kg, but the track itself must still be anchored to structure, not just to a finished ceiling surface.
| Item | Typical figure | What it means on site |
|---|---|---|
| Coil curtain weight | 4.2–6 kg/m² depending on material and wire diameter | Size the anchors and the lifting plan from this, not from the panel area alone |
| Example panel: 3 m × 2.5 m in 1.2 mm stainless steel | ≈45 kg | Two-person lift at minimum; mechanical lifting above about 4 m width |
| Pulley capacity in a quality aluminium track | ≈80 kg per pulley | The pulley rating does not remove the need to anchor the track to structure |
| Pulley spacing along the top edge | ≈15 cm | Even pleats and even load distribution along the track |
| Fixing chain attachment points | ≈10 cm | Controls the pleat rhythm before the chain tension is set |
| Fullness (wrinkle ratio) | 150%–200%, curtain ≥1.2 × track length | Prevents the flat, sparse look of an under-width curtain |
Step 1: Attach the Pulleys to the Curtain
The pulleys are what allow the curtain to slide and pleat. Work on a clean, flat surface or a protected floor area.
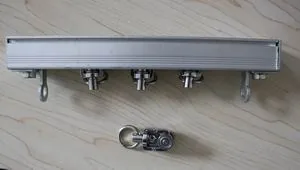
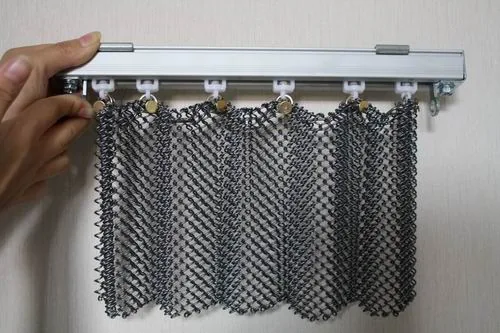
Starting from one end of the metal coil drapery, insert a screw through an opening in the mesh, then attach the pulley metal ring and the fixing chain, and tighten the nut to secure the pulley. Install a pulley approximately every 15 cm along the top edge of the curtain. Space the fixing chain attachment points at roughly 10 cm intervals to control the pleating evenly.
Set the fullness ratio before the pulleys go on
Metal coil drapery performs best with a wrinkle effect of 150%–200%, which means the curtain width should be at least 1.2 times the length of the track. If the curtain is too narrow for the track, the pleats will flatten and the installation will look sparse. Confirm the width ratio before the pulleys are fixed in place.
Repeat until every pulley is installed and the top edge is uniformly prepared. The curtain should now hang in loose, even folds when lifted.
Step 2: Mount the Track and Insert the Pulleys
The sequence here depends on access. For most installations, mount the track first, then slide the pulley-equipped curtain into it.
Assemble the track brackets
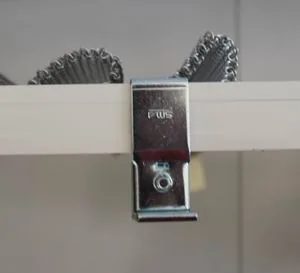
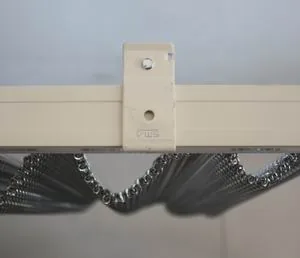
Hook the suspension brackets onto the edge of the track and press the other end into the track to lock it. If the track requires splicing for wide openings, use splicing clamps and bolts to join sections securely before mounting.
Cap one end before the curtain goes on
Install an end cap on one end before the curtain goes on. This prevents pulleys from sliding out during handling and keeps the installation controlled.
Mount the track to the ceiling or wall
With a helper, lift the track into position. Use a level to confirm it is straight and true. Fasten through the suspension brackets into structural supports or appropriate anchors. For heavy installations, use two fasteners per bracket and ensure fasteners are sized for the track assembly and curtain weight.
Slide the pulleys into the track
With one end capped, feed the pulley wheels into the open end of the track one by one. The curtain will gather as the pulleys enter; this is expected. Once all pulleys are in, install the second end cap.
Step 3: Finalize the Track and Set the Fixing Chain
With both end caps in place, decide how the curtain should behave.
| Decision | Fixed configuration | Sliding configuration |
|---|---|---|
| Fixing chain | Connected to the end cap and secured | Left disconnected from the end cap |
| Behaviour | Pleats locked in a stationary arrangement | Curtain draws open and closed on the track |
| Typical use | Decorative screen, privacy partition, backdrop | Opening or window treatment that has to be operated |
| What to watch | Set chain tension last, after the pleats are even | Pulleys rest to one side when the curtain is drawn |
If the curtain needs to stay fixed in position—for example, as a decorative screen or a privacy partition that should not be moved—connect the fixing chain to the end cap and secure it. This locks the pleats in a stationary arrangement.
If the curtain should slide freely, leave the fixing chain disconnected from the end cap. The pulleys will naturally rest on one side of the track, and the curtain can be drawn open or closed as needed.
At this stage, adjust the pleat spacing by hand. With pulleys at 15 cm intervals and chain points at 10 cm, the folds should already be even. Make small corrections by sliding individual pulleys along the track before the final chain tension is set.
Safety and Load Considerations for Commercial Sites
Metal coil curtains are lightweight relative to their strength, but they are not weightless. Three points deserve attention on commercial projects:
Respect the weight
The coil & metal drapery product literature notes that these curtains “can be extremely heavy” in larger configurations. For panels exceeding roughly 4 m in width or installations at high ceiling heights, plan for mechanical lifting or a two-person lift. Do not stand on furniture or unstable platforms to reach the track.
Anchor to structure, not to the surface
The track carries the full dead load of the curtain plus any dynamic load from operation. On drywall ceilings, locate joists or install blocking. On concrete, use wedge anchors or adhesive anchors rated for the substrate. A track that is level but under-anchored will fail gradually under load.
Use compatible fasteners
When mounting metal tracks and brackets near concrete or masonry, isolate dissimilar metals to prevent galvanic corrosion over time. Stainless steel fasteners are a safe default for most commercial environments.
| Substrate | Fixing to use | Note |
|---|---|---|
| Concrete ceiling or soffit | Wedge anchors or adhesive anchors rated for the substrate | Check the anchor rating for the load, not only the drill size |
| Drywall ceiling | Locate joists, or install blocking behind the board | Never carry a heavy track on the finished board alone |
| Wood or steel frame | Fasteners sized for the track assembly and curtain weight | Two fasteners per bracket on heavy installations |
| Metalwork near concrete or masonry | Stainless steel fasteners, dissimilar metals isolated | Prevents galvanic corrosion over the life of the installation |
After Installation: What to Tell the Client About Maintenance
One of the practical advantages of metal coil drapery for commercial spaces is that it requires far less attention than fabric curtains. Ordinary curtains need regular cleaning and are prone to staining and deformation; metal coil curtains resist fading and wear, and daily upkeep is limited to wiping dust with a dry cloth.
For heavier soil—fingerprints near a handle, dust accumulation in a lobby—use a mild cleaning agent on a soft cloth and wipe the affected area. Avoid harsh chemicals or abrasive pads, which can dull the surface finish. In humid or coastal environments, specify stainless steel coil drapery; the material is corrosion-resistant and suitable for exterior or semi-exterior applications.
If the curtain is installed in a high-traffic area where it will be drawn frequently, check the track and pulleys after the first month of operation and then annually. A small amount of dry lubricant on the pulley wheels, if recommended by the track manufacturer, will keep operation smooth.
A Note on Project Planning
Metal coil curtains are supplied as custom-fabricated panels, and the installation sequence assumes the track and curtain were ordered together with matched specifications. If you are retrofitting a track system to an existing curtain, verify pulley compatibility and track weight ratings before ordering hardware. The most common installation issues on commercial jobs trace back not to the fixing stage but to a mismatch between curtain width, track length, and the intended fullness ratio.
For projects requiring curves, wide spans, or fire-rated documentation, confirming these details at the specification stage is far easier than solving them on site. A supplier who understands the installation sequence can pre-assemble track sections, supply the correct anchors for the substrate, and provide load data for the specifying engineer—turning a potentially fiddly install into a predictable one-day task for the crew.
Metal coil curtain installation: frequently asked questions
How much does a metal coil curtain weigh?
Metal coil curtain weight typically ranges from 4.2 kg/m² to 6 kg/m² depending on material and wire diameter, so a 3 m × 2.5 m panel in 1.2 mm stainless steel can approach 45 kg. Verify that the ceiling structure or wall can carry that load plus the track hardware before any drilling starts.
How far apart should the pulleys and the fixing chain be?
Install a pulley approximately every 15 cm along the top edge of the curtain, and space the fixing chain attachment points at roughly 10 cm intervals. That combination is what controls the pleating evenly and spreads the load along the track.
What fullness should I order for a coil curtain?
Metal coil drapery performs best with a wrinkle effect of 150%–200%, which means the curtain width should be at least 1.2 times the length of the track. A curtain that is too narrow for the track will flatten out and the installation will look sparse.
Can a coil curtain track be fixed to a drywall ceiling?
Only with a fixing that reaches structure. Locate joists or install blocking behind the drywall, and use anchors rated for the substrate on concrete. A track that is level but under-anchored will fail gradually under load, so it should never be carried by the finished ceiling surface alone.
How is a metal coil curtain cleaned?
Daily upkeep is limited to wiping dust with a dry cloth. For heavier soil such as fingerprints or dust accumulation in a lobby, use a mild cleaning agent on a soft cloth and avoid harsh chemicals or abrasive pads that can dull the surface finish. In humid or coastal environments specify stainless steel coil drapery.
When should the track and pulleys be checked?
In a high-traffic area where the curtain is drawn frequently, check the track and pulleys after the first month of operation and then annually. A small amount of dry lubricant on the pulley wheels, where the track manufacturer recommends it, keeps operation smooth.
Related reading
- Metal coil drapery guide: material, open area, fullness and track
- Woven metal interiors and the metal fabric ceiling range
- Stainless steel rope mesh guide
- The full architectural metal mesh range and interior design applications
Next step: send the opening size, the ceiling build-up and the intended fullness. We will come back with the track, pulley count and panel weight as one package — request a metal coil curtain quotation.
That is how our factory ships coil drapery: track sections pre-assembled, anchors matched to the substrate, and load data issued for the specifying engineer.